Creating Triggers
In order to see and test newly created Triggers that have not yet been published, you'll need to pass a Developer Mode JWT to the Rollout Components
Where to create a Trigger#
To create your Trigger, go to the Triggers page in the Rollout dashboard and click the + New Trigger button in top right hand corner.
Creating a trigger consists of three steps:
1. Configure Settings#
First enter some details to uniquely describe your Trigger. The following table explains the various settings and their properties.
| Trigger Setting | Required | Description | Example |
|---|---|---|---|
| Key | ✅ | Unique ID for the Trigger | task_completed |
| Name | ✅ | Label shown to users | Task Completed |
| Description | Description shown to users | When any task is completed in X app |
Trigger Keys must be unique among all of your connector's Triggers
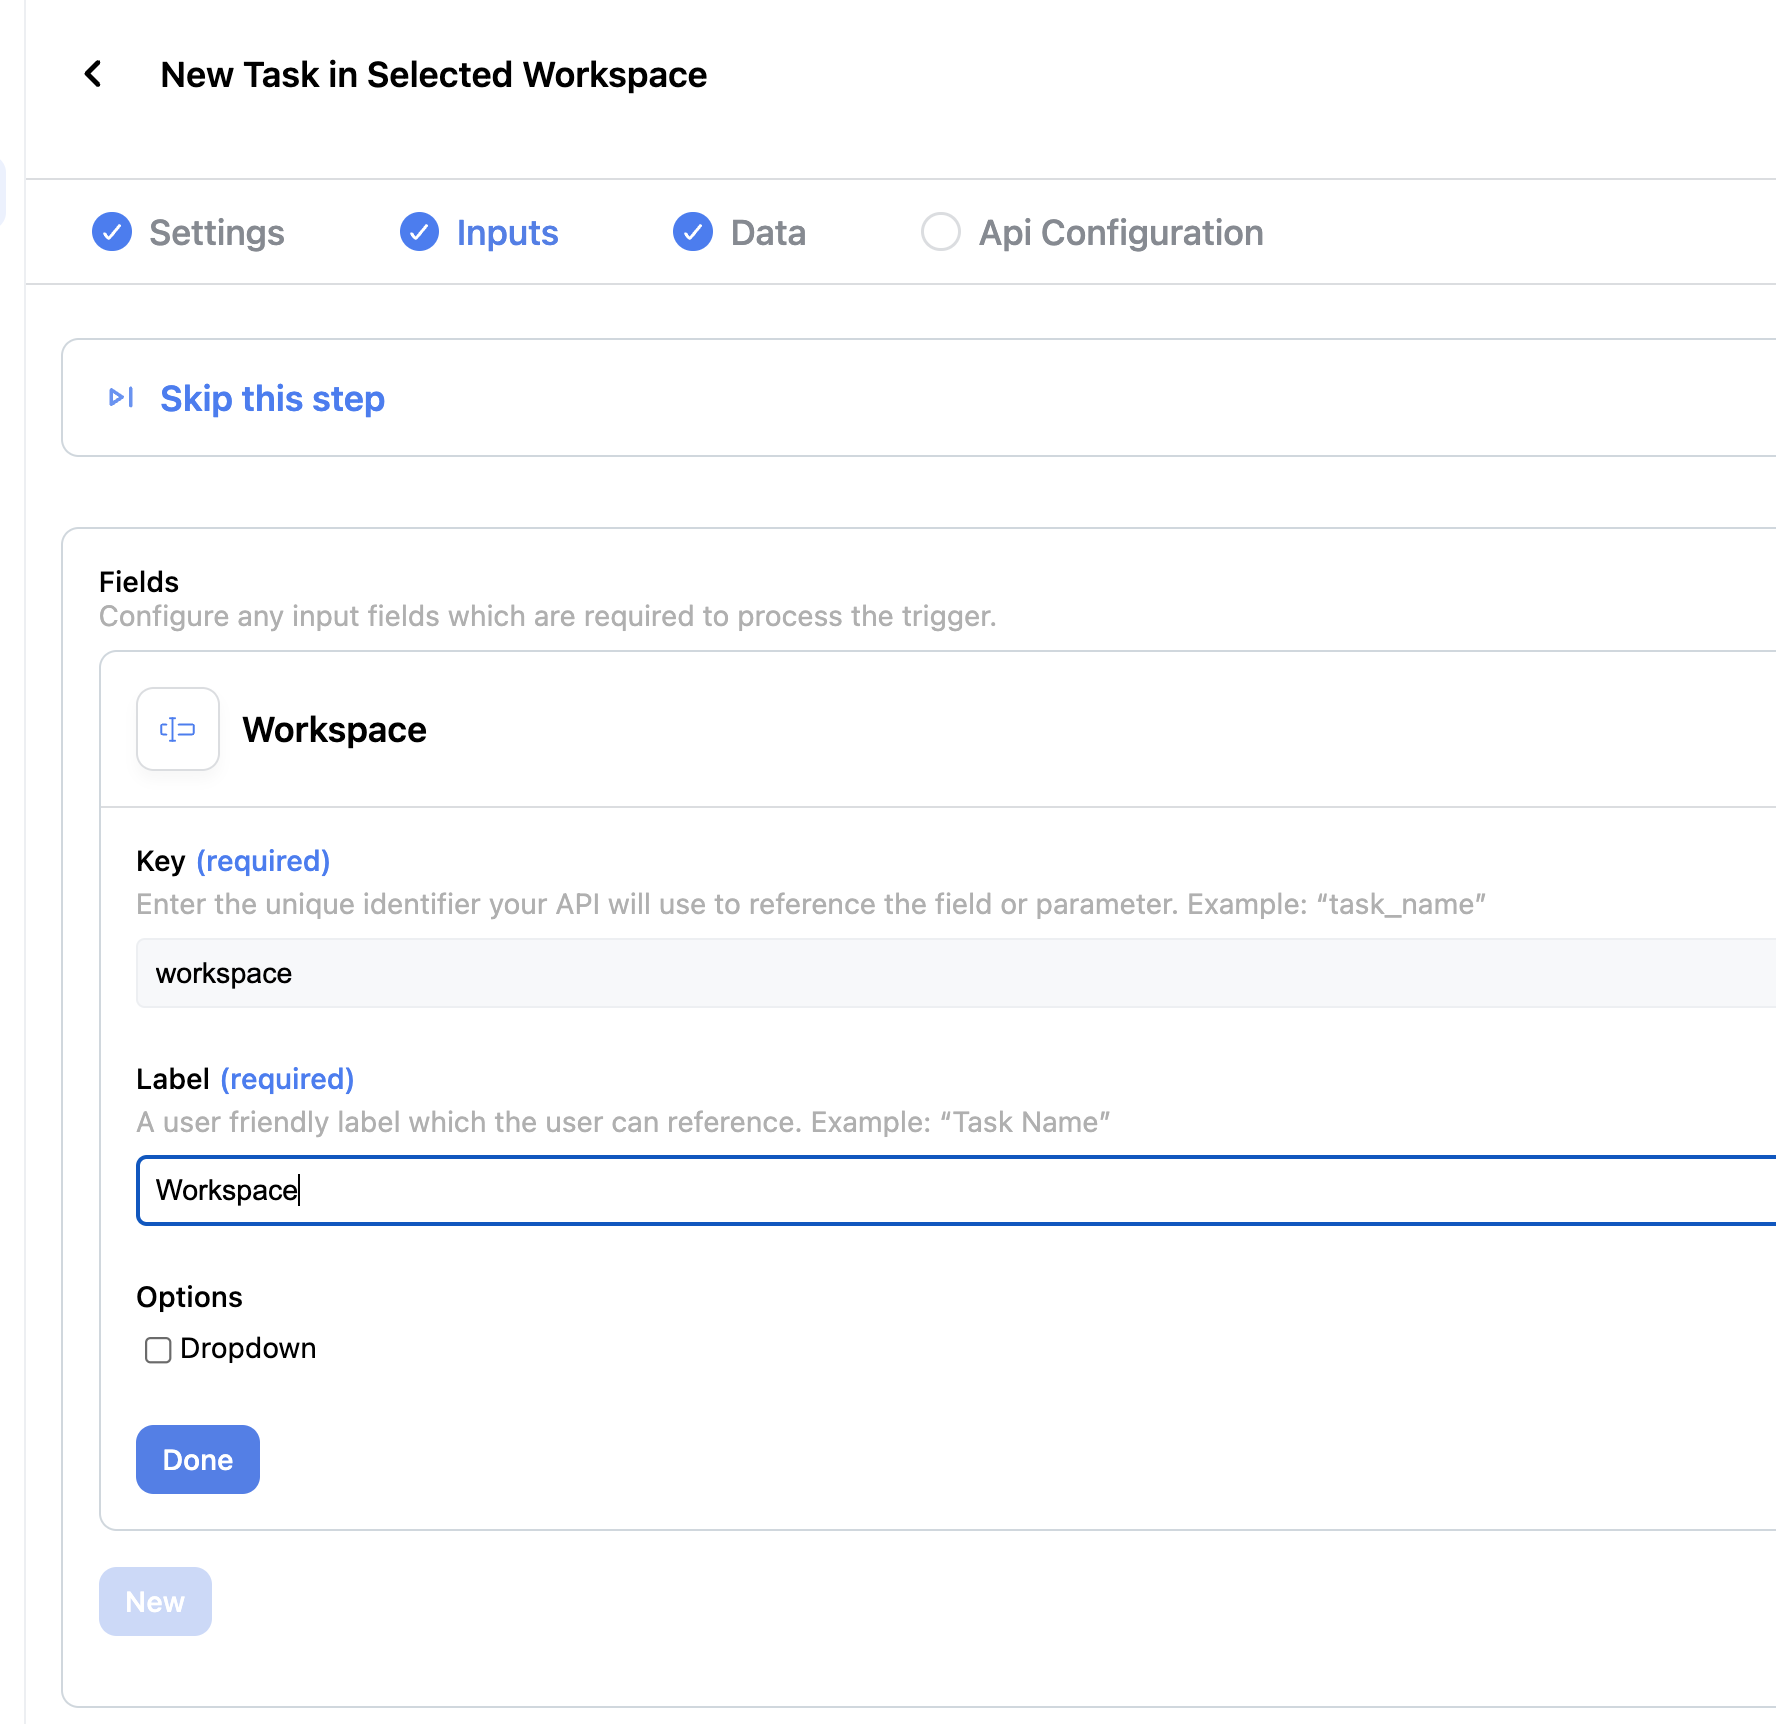
2. Describe Inputs & Outputs#
Inputs refer to optional information that must be supplied inorder to setup the trigger. Unless there are no inputs or they are preselected and hidden, Inputs are shown to the user to set up the Trigger.
To understand the example, imagine that we are creating a trigger for when a new task is created in a desired workspace. To setup the trigger, we need to know the workspace which the user can identify as a Trigger Input.
| Property | Required | Description | Example |
|---|---|---|---|
| Key | ✅ | Unique ID for the Input | workspaceId |
| Label | ✅ | Label shown to users | Workspace Name |
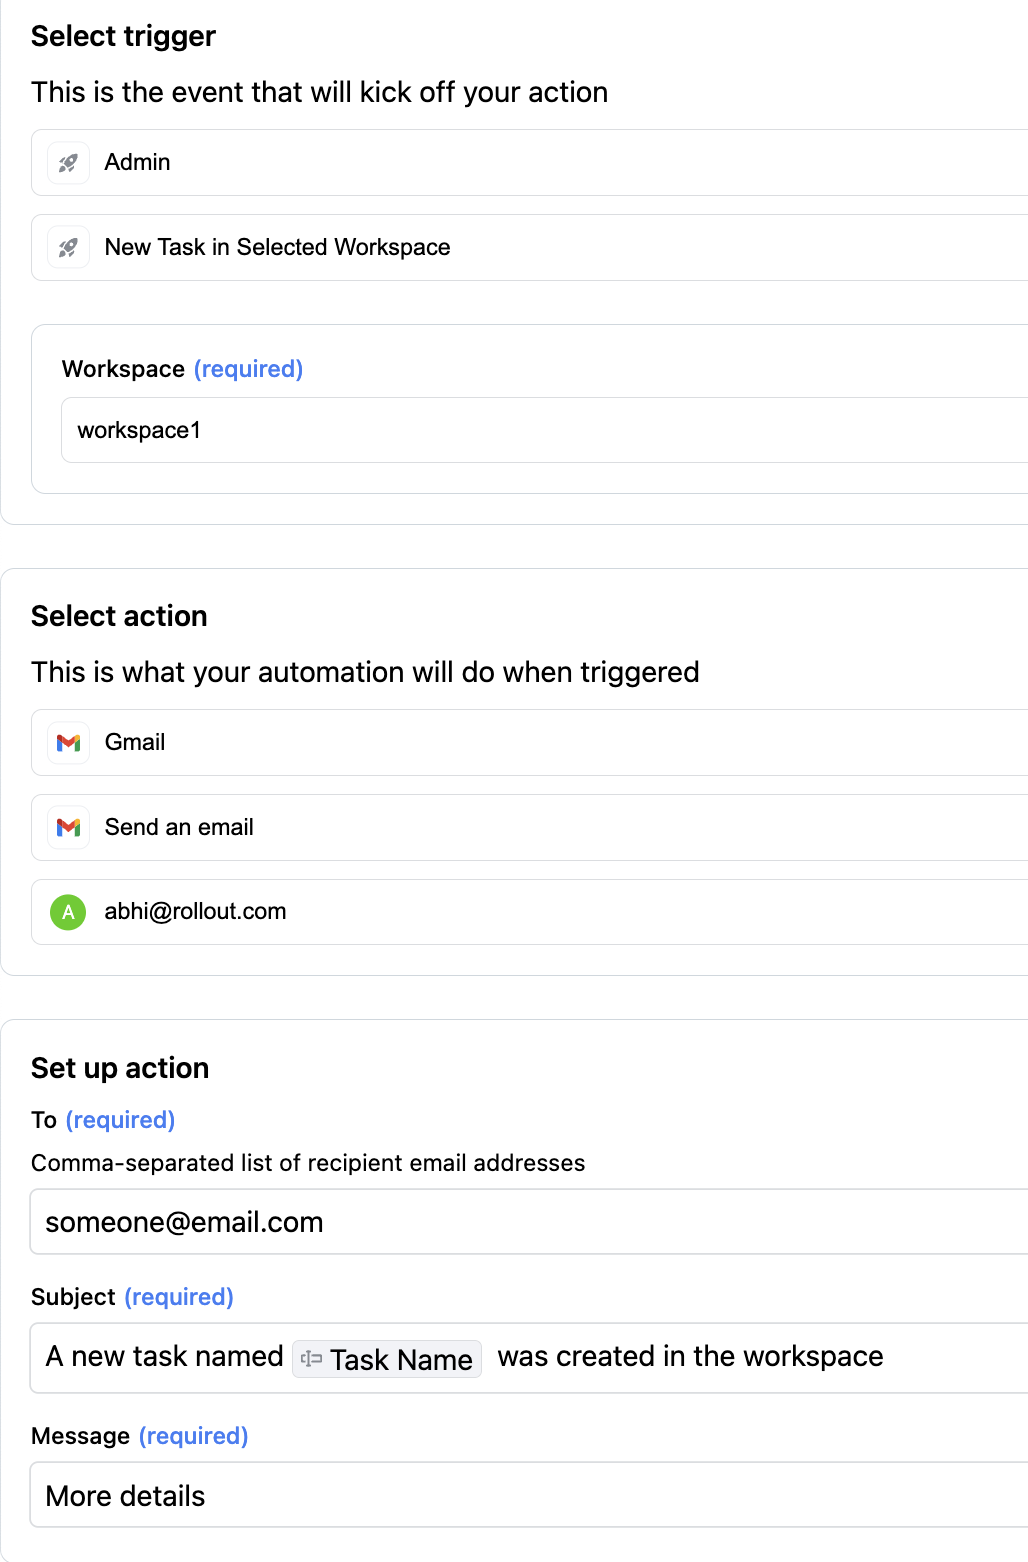
Input Example:
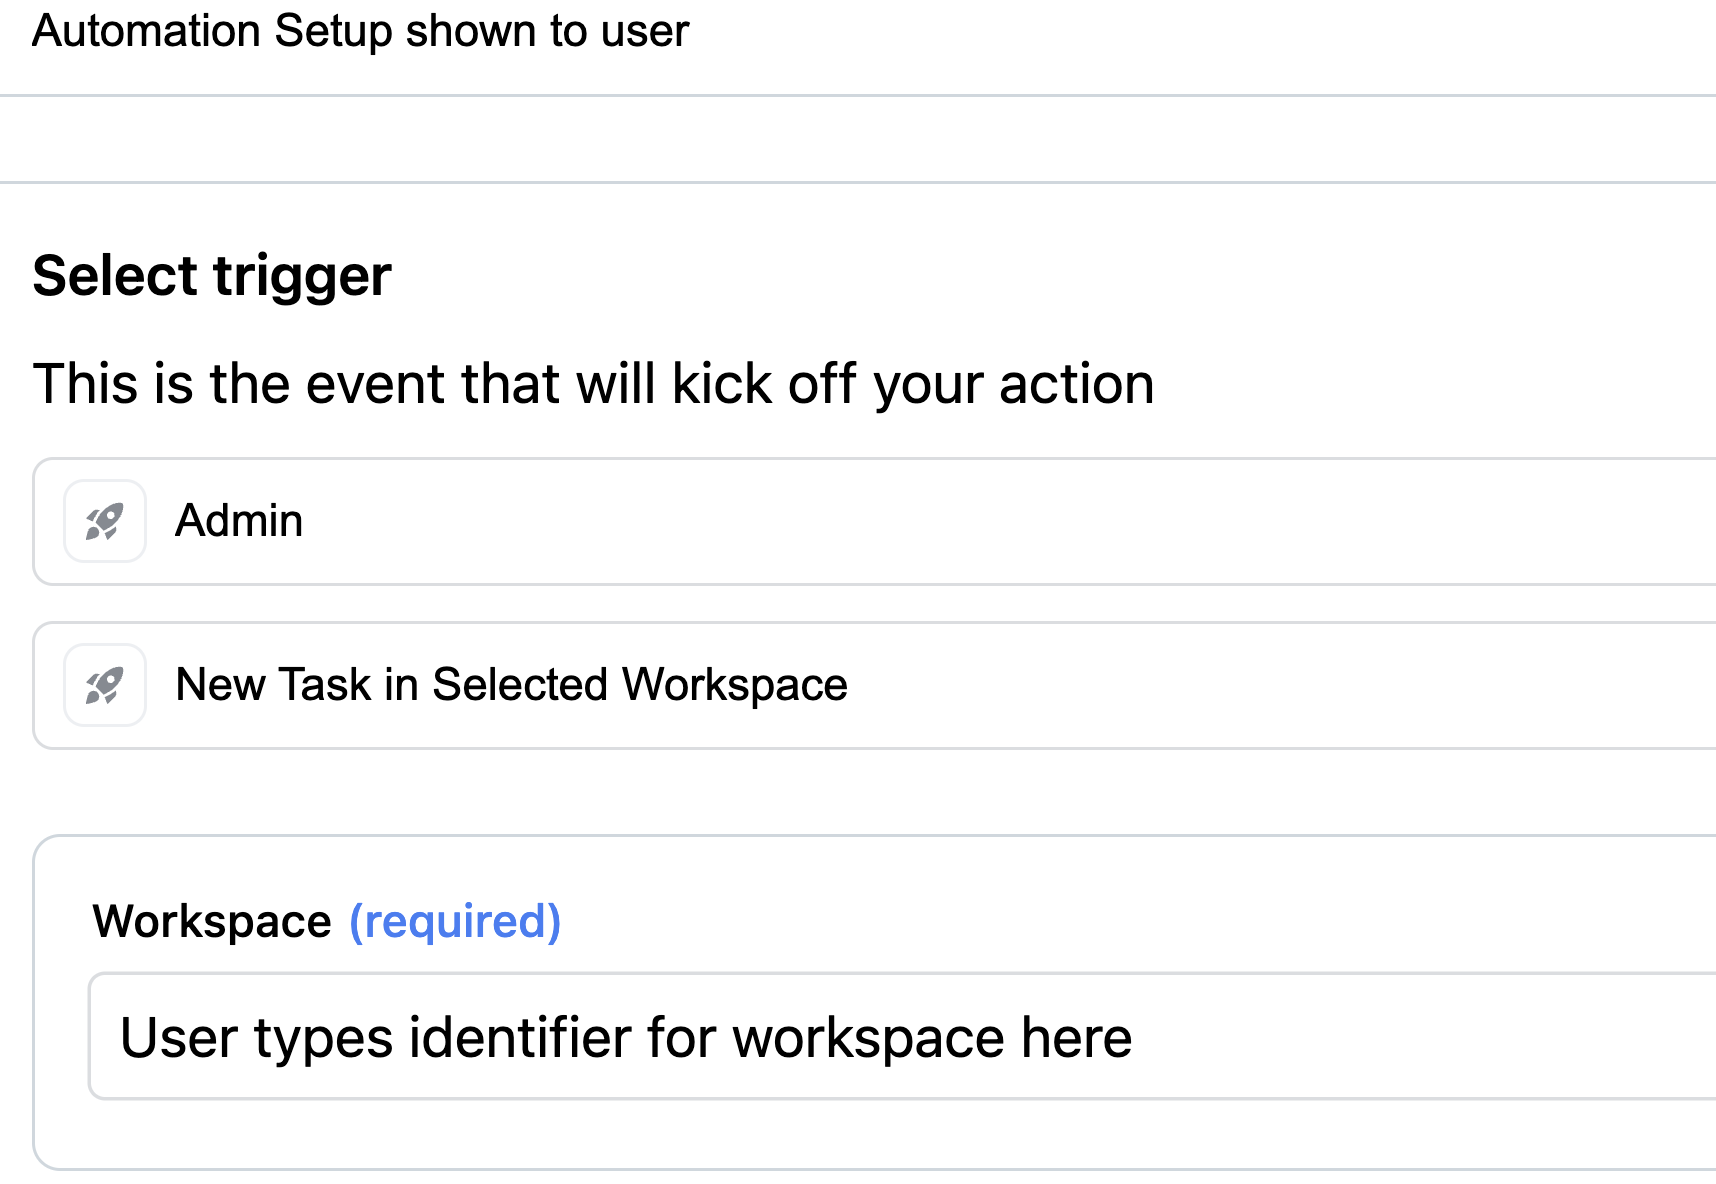
How it renders in the AutomationsManager component:
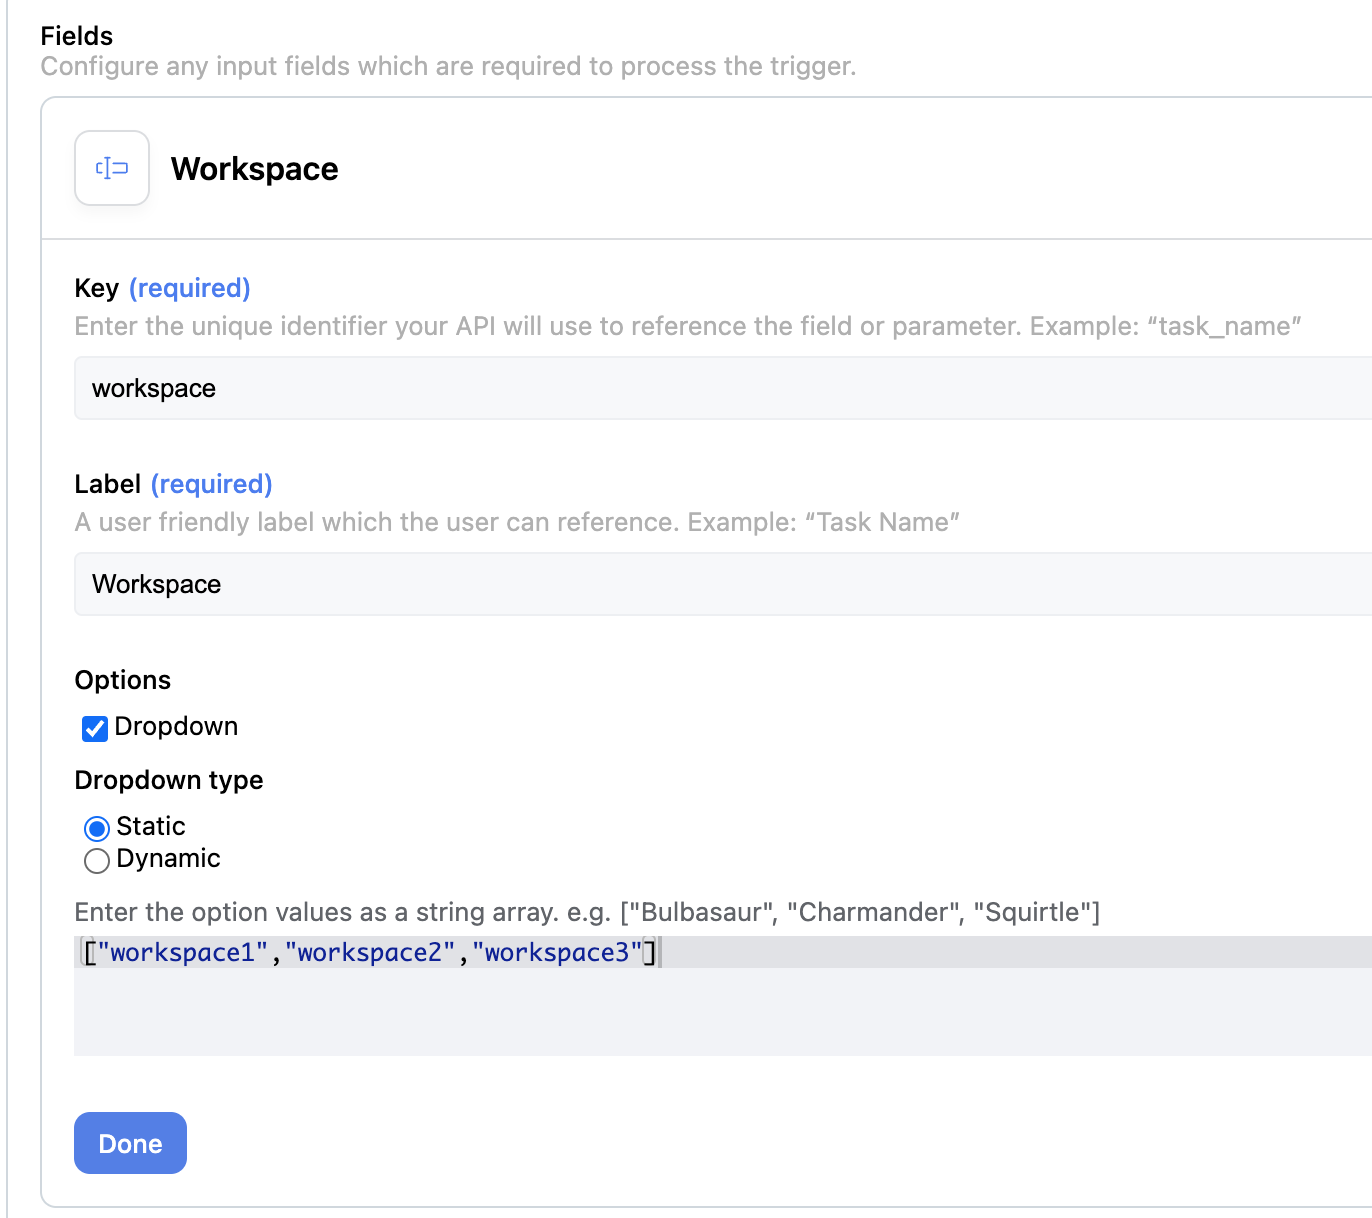
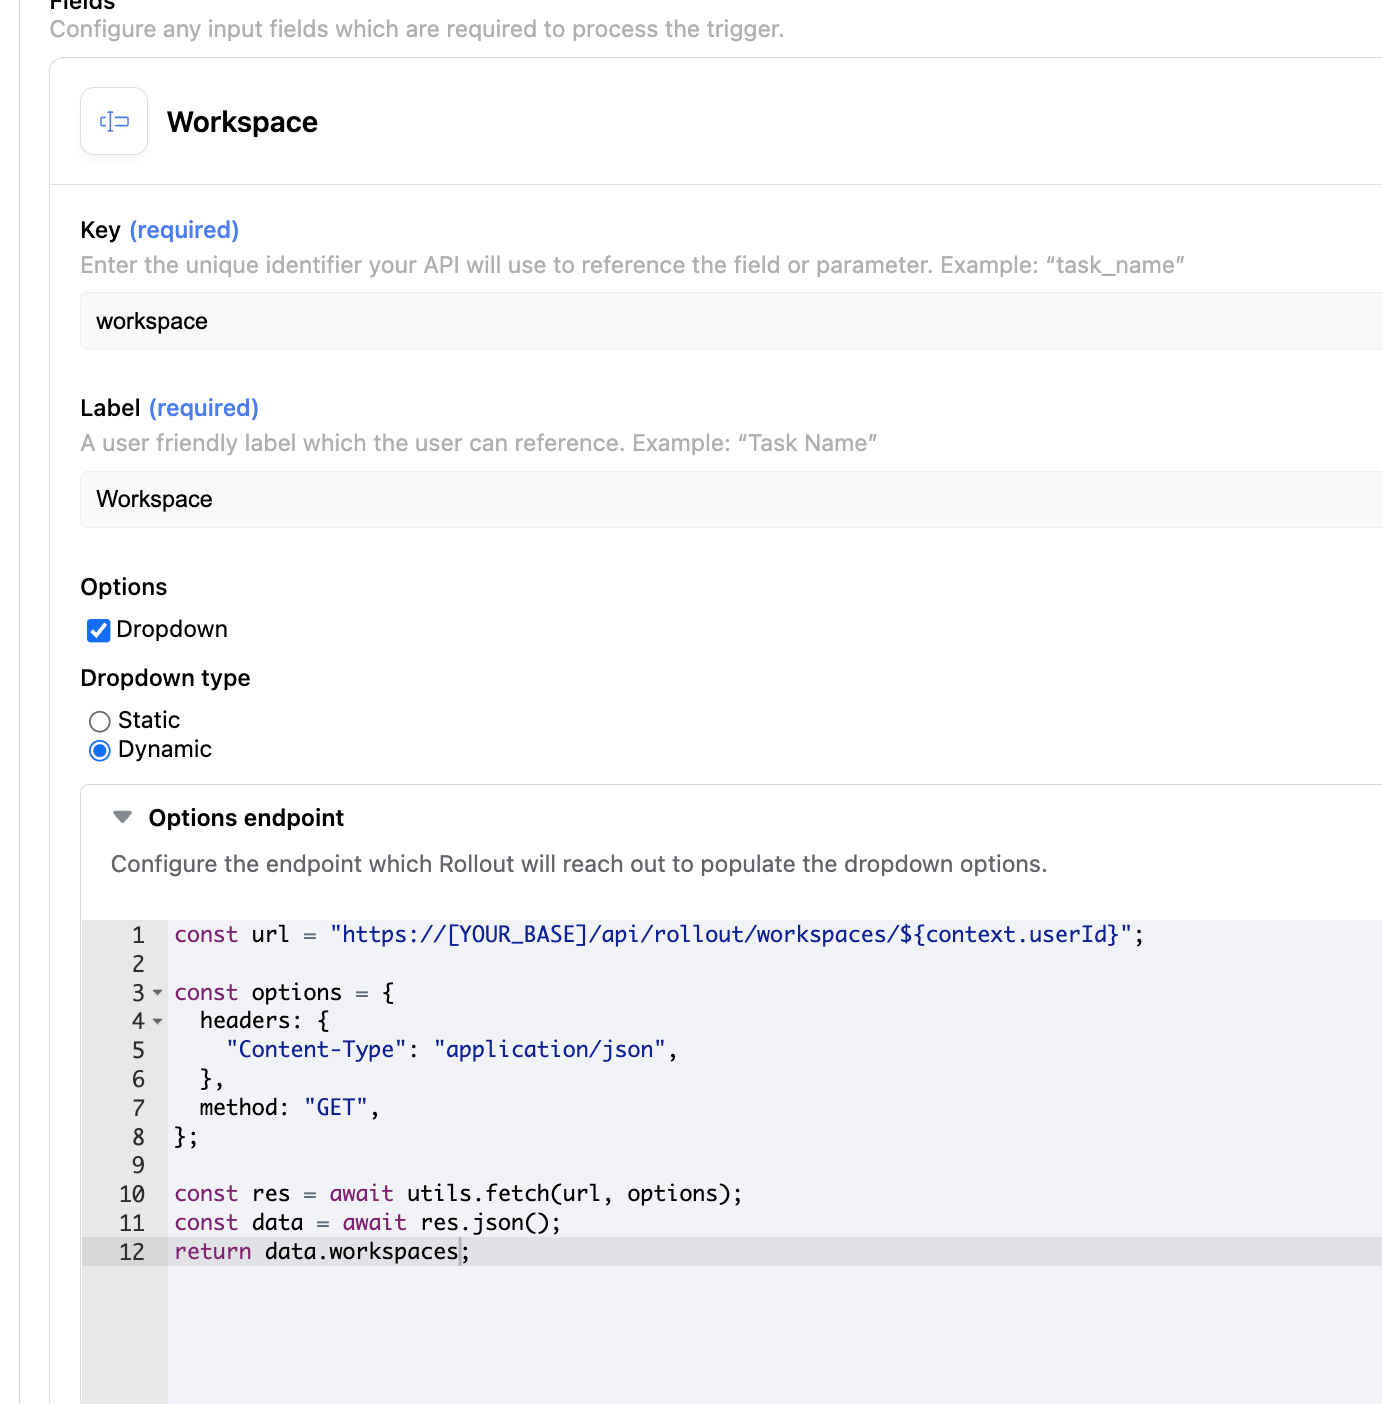
Dropdown Inputs#
In the example above, the user sees a text input in which to enter the workspace ID or Name which Triggers automatinos for any new task in that workspace.
However, in many cases it is a better experience for the user to select the workspace from a list. To use a dropdown instead, when setting up the input,
select the Dropdown checkbox to render a list of options.
If your list of workspaces is fixed, select the Static option and add unique identifiers for the workspaces as an array of strings.
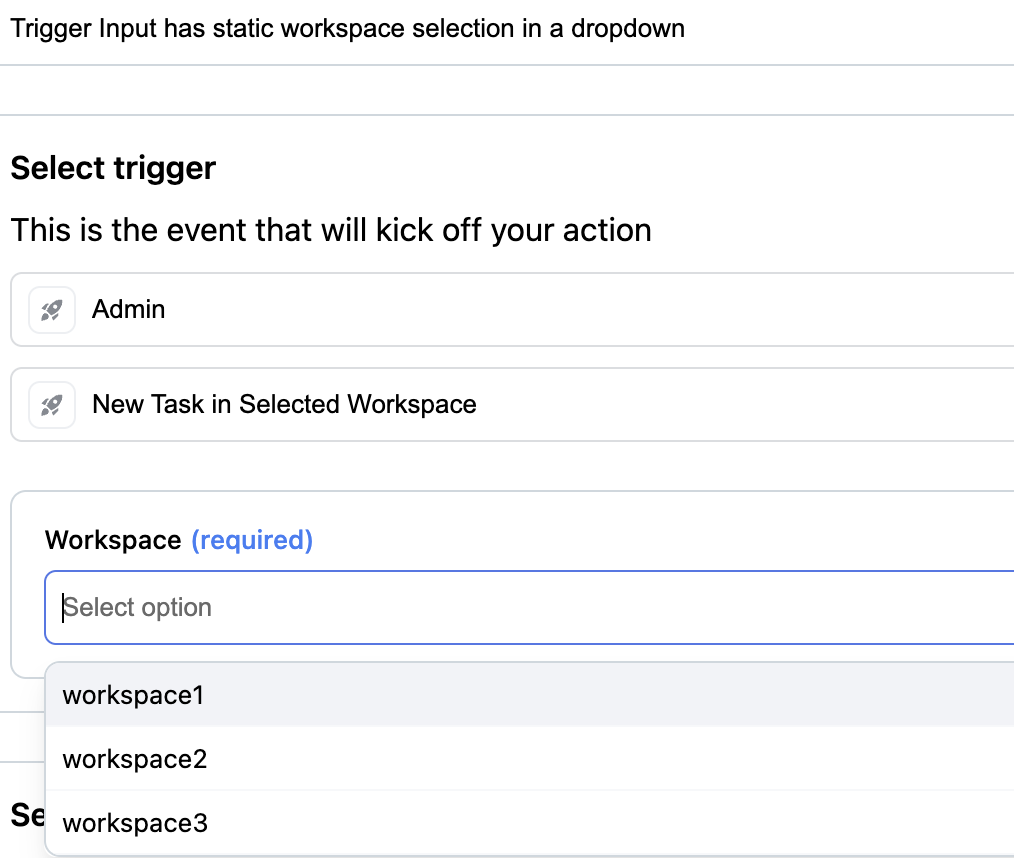
How it renders in the AutomationsManager component:
Dynamic Inputs#
Suppose that the workspaces for each user are different. We want to make a call to our API to fetch the unqiue list of workspaces a user is part of.
We can setup that API request either in UI mode or Code mode and reference information such as the userId to make the request.
Setup Example:
3. Outputs#
Outputs refer to optional information that can be supplied by the trigger event and used in the action. They can be referenced in the inputs of the Action.
| Property | Required | Description | Example |
|---|---|---|---|
| Key | ✅ | Unique key for each Output | task_name |
| Label | ✅ | Label shown to user when selecting variable reference (via the @ menu). | Task Name |
Output Example (Static Schema):
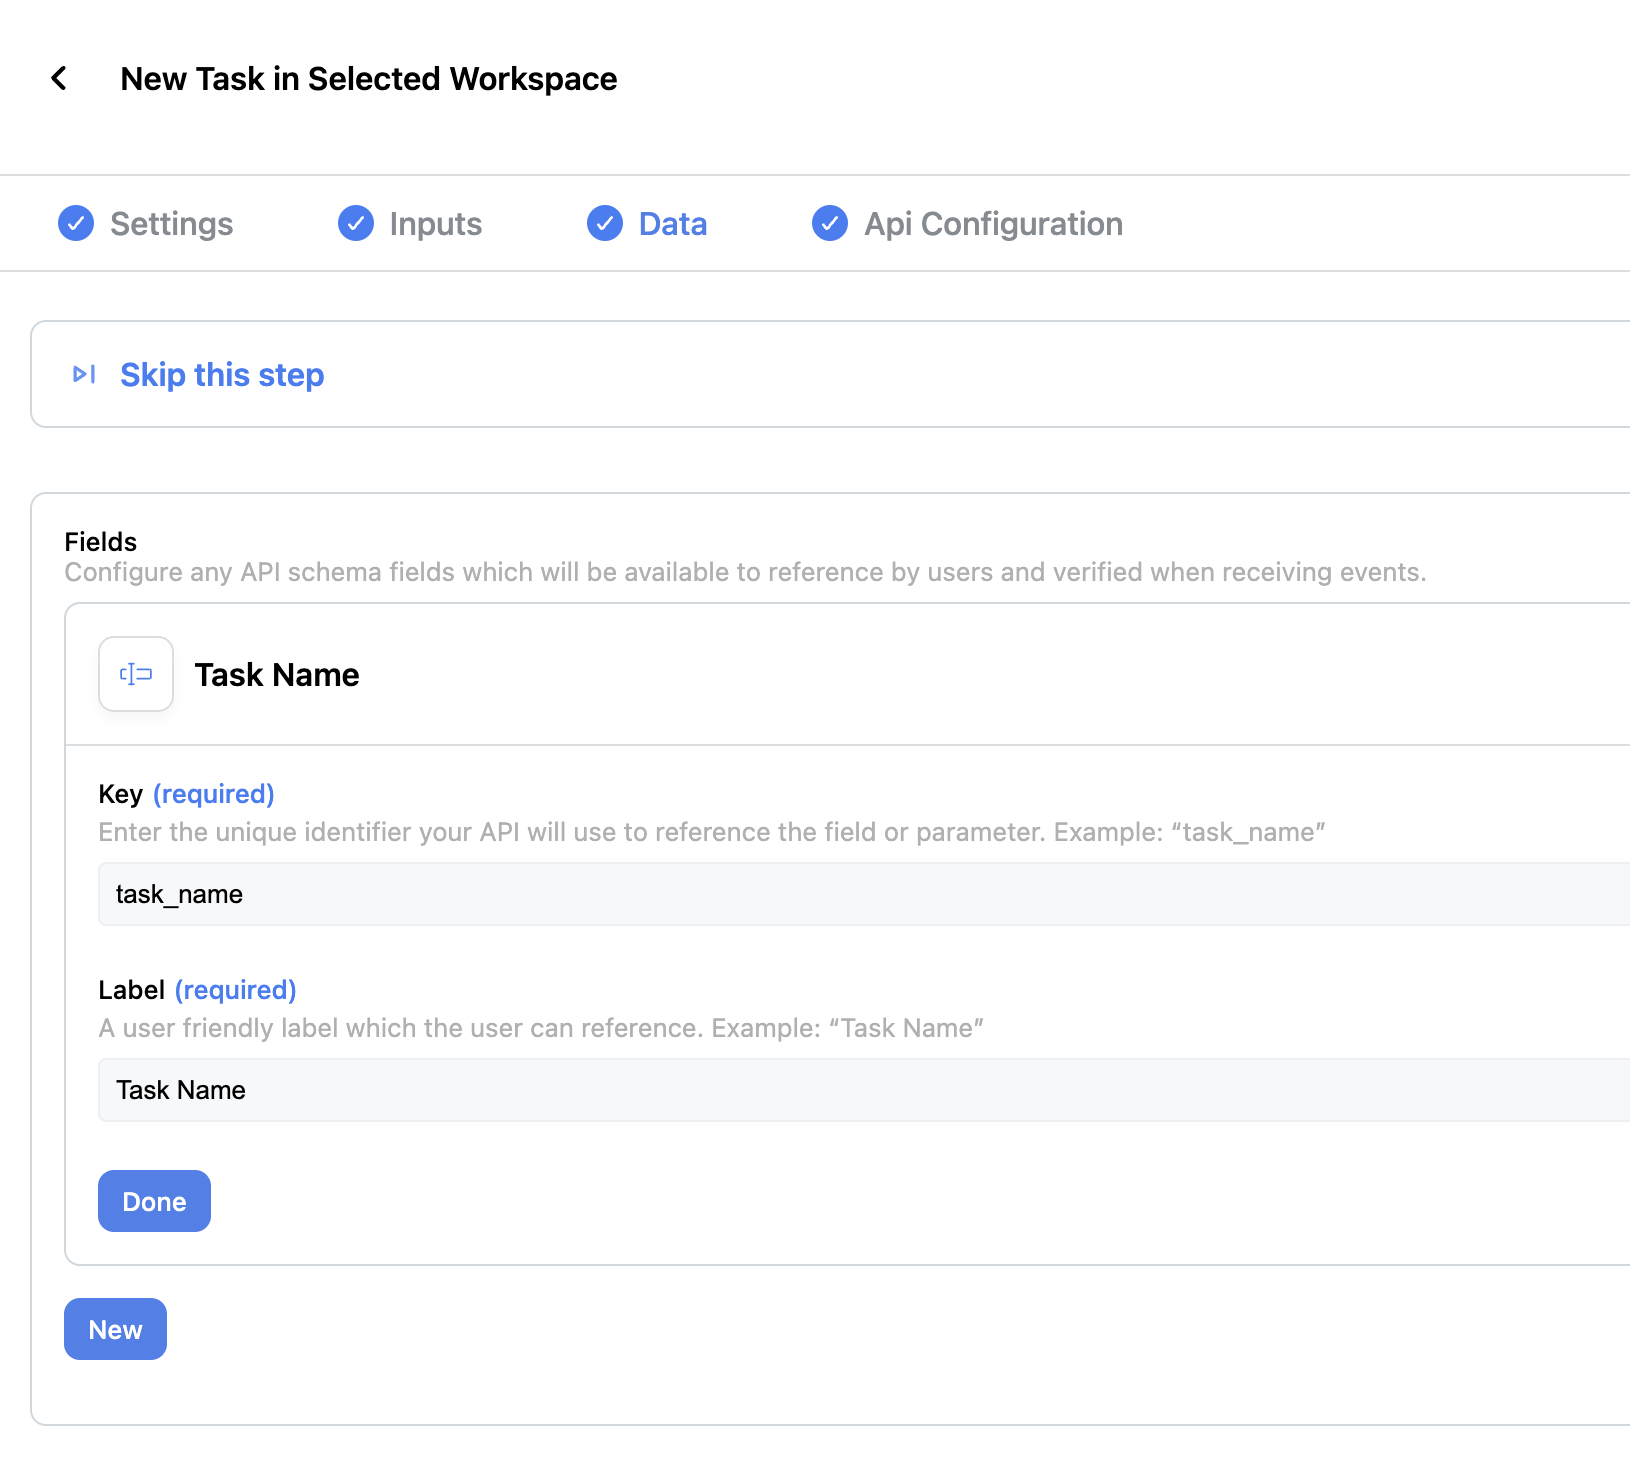
How it renders in the AutomationsManager component:
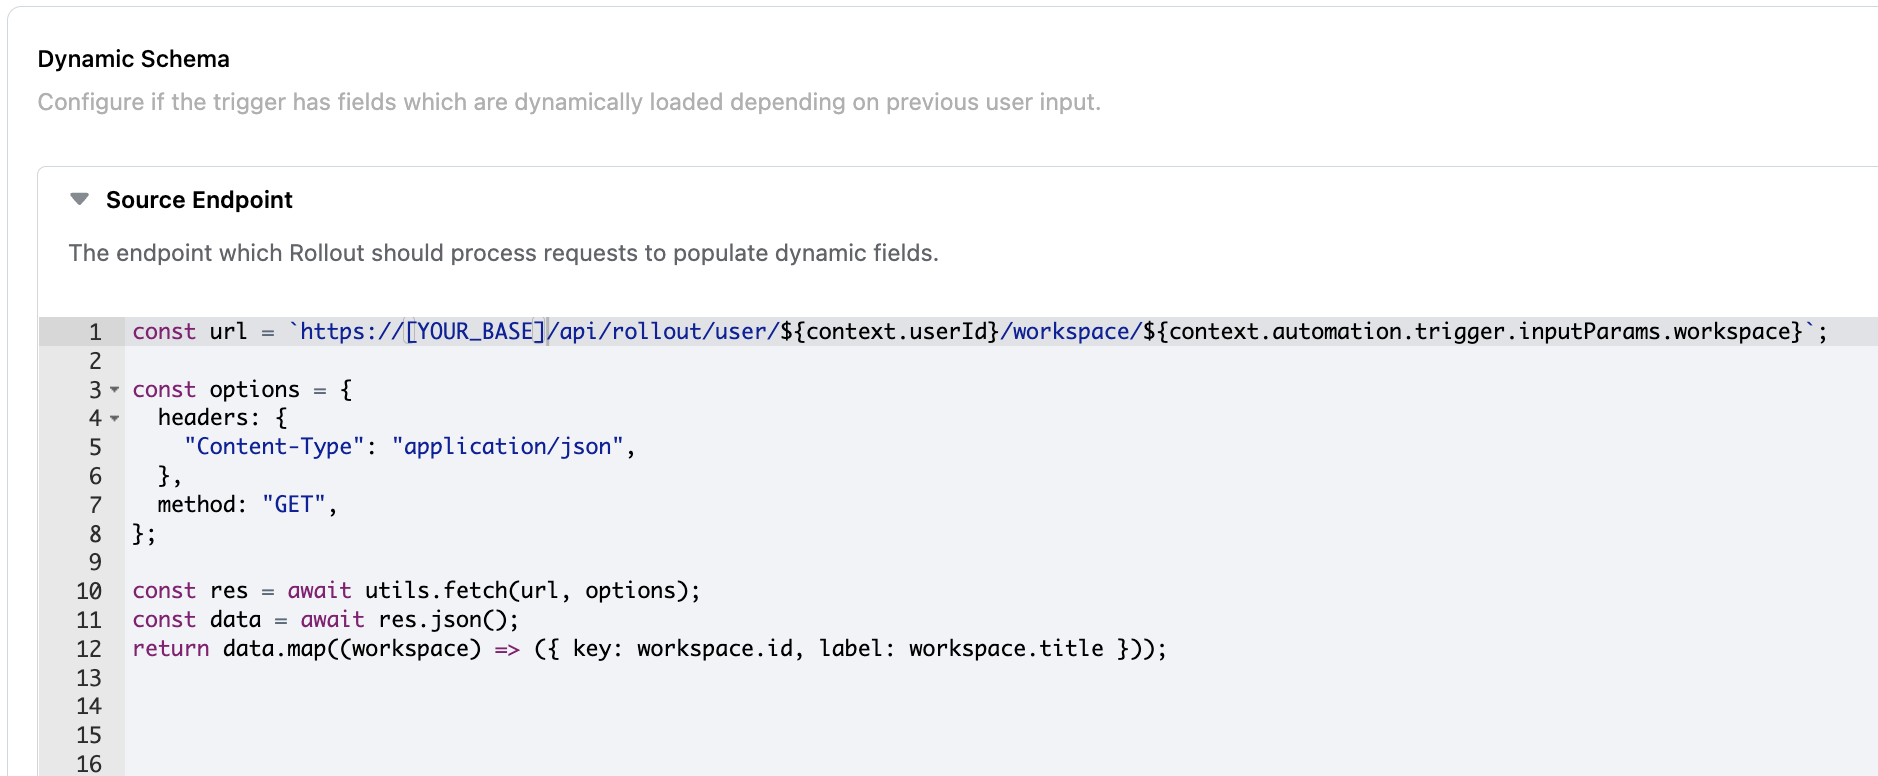
Dynamic Schema#
Similar to how we can can get Input options dynamically, we can also fetch the Outputs schema depending on the user and their selected Input values.
The output is expected be be a list of objects with the following properties:
| Property | Type | Description |
|---|---|---|
| key | string | Unique key for each output. |
| label | string | Label shown to users when selecting variable reference (via the @ menu). |
Dynamic Schema Example:
4. Decide how you want to send Trigger data to Rollout#
You can send Trigger data to Rollout in 2 different ways:
- Send HTTP POST Requests ("Push Trigger") with the event data to a Rollout endpoint whenever a Trigger event occurs
- Have Rollout subscribe to Trigger data via REST API to a webhook
The first approach is the simplest and fastest way to implement Triggers and further described below, the second approach is described on the Using REST Hooks page.
Sending Trigger events to Rollout via POST Requests#
When a Trigger event happens within your product, to complete any Automation that should be kicked off by the event, you send Rollout the following data:
- The key of the event: in the POST request body
- The Outputs of the event: in the POST request body
- The user or account ID in which the event is occuring: this will be encrypted in a JWT token
To learn more about how to generate a JWT, see the User Auth page.
The format of the HTTP request is as follows:
curl --location --request POST 'https://app.rollouthq.com/api/trigger-event' \--header 'Content-Type: application/json' \--header 'Authorization: Bearer <JWT>' \--data-raw '{"triggerKey": "taskCompleted","payload": {"task_name": "<key_value>"}}'
var myHeaders = new Headers();myHeaders.append("Content-Type", "application/json");myHeaders.append("Authorization", "Bearer <JWT>");var raw = JSON.stringify({triggerKey: "taskCompleted",payload: {task_name: "<key_value>",},});var requestOptions = {method: "POST",headers: myHeaders,body: raw,redirect: "follow",};fetch("https://app.rollouthq.com/api/trigger-event", requestOptions).then((response) => response.text()).then((result) => console.log(result)).catch((error) => console.log("error", error));
Understanding the HTTP Request Approach#
When an Automation is created (whether by the user or programmatically by the Partner via API) an ID is required to identify the account to which the Automation belongs to.
When a Trigger event is sent to Rollout, the Rollout platform decodes the JWT to get this ID, and then determines if any Automations exist for that account and event type. If so, the Automations are executed; if not, nothing happens.
The assumption behind this approach is that the you, the Partner, will modify your application and send all events to Rollout regardless of whether the user has an Automation that will be triggered by it and it's the responsibility of Rollout to check whether it should trigger any Automations. This approach requires less logic to be added to the Partner app.
However, if you prefer to send less data to Rollout, you can also implement the logic for filtering events to only those for users with an Automation. Check our Automations API to see how to query for all Automations that belong to a user. An alternate way to achieve the same goal of sending less data to Rollout is to use the REST Hooks approach described on the next page.